72 Hour Kit – Food

In an emergency, food is actually pretty far down the list of necessities. The average person can go weeks without food.  But in a disaster you are likely to be working harder and doing more than you normally would. You’ll probably get irritated and fatigued easily in an emergency, so you should make food an important part of your emergency plan.

When picking what food to put in your emergency kit, you should choose food that’s lightweight, shelf stable, and as well balanced nutritionally as possible.  Another consideration, especially when involving children, is to make sure it is something that you are willing to eat.  The last thing in a disaster that you want is food that is unappealing to eat.

Here are some food options that we recommend:

MREs

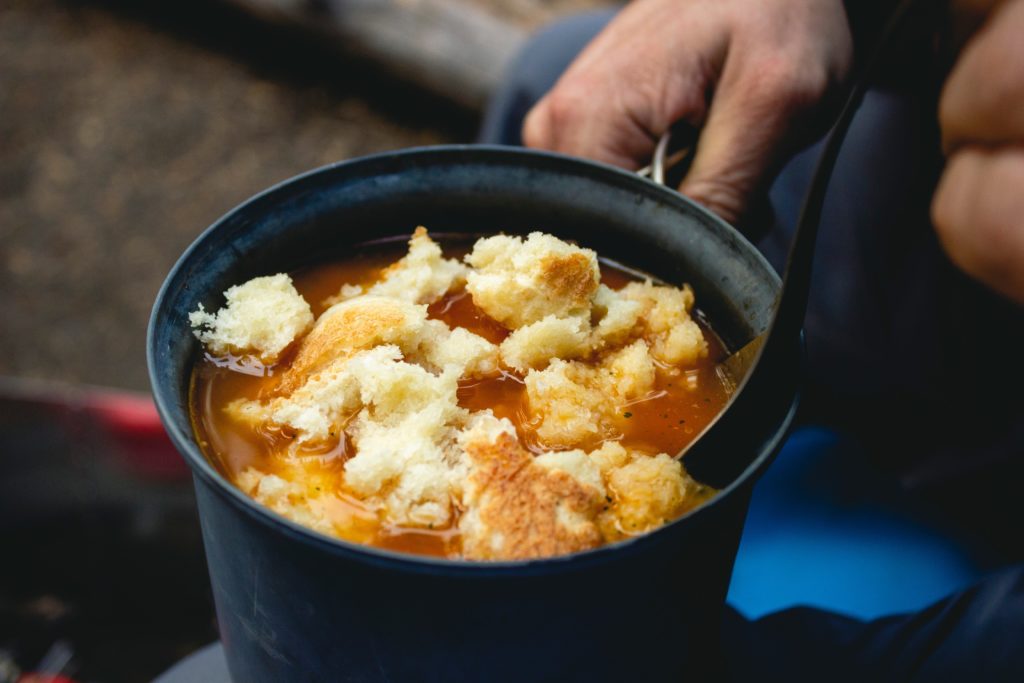
Consider Meals Ready to Eat (MRE’s).  These were originally used for military applications. Previously, the only way to get them was from military surplus or speciality stores.  However, most of the MREs you see today maintain the same look and feel, but are not from military overstock.  A number of companies now make MRE meals for camping, hiking, and emergency preparedness.  There is a large variety of meals, side dishes, and even desserts to choose from. 

Advantages

MREs are shelf stable at room temperature for 5+ years.  Typically they come in a foil lined pouch that you simply heat by using a MRE heater or by placing in a pot of hot water.  Wait a few minutes, tear off the top and eat straight from the package.  They are very convenient, have a good variety and are safe to consume. 

Disadvantages

Most MREs were designed for soldiers in combat and calorie count can be high.  They weigh more than freeze-dried meals and can be expensive compared to fresher foods and some freeze-dried options. Some people may not like the taste of MREs.

Freeze Dried Meals

Another option is freeze dried meals.  

Advantages

Freeze dried meals weigh very little and you can pack a lot in a much smaller space.  Freeze drying also retains nutritional value better than most other preservation methods and often the process preserves the actual color and shape of the original food.  Most freeze dried products are shelf stable for as long as 25 years depending on the packaging and storage environment.

Disadvantages

Water is required for reconstituting freeze-dried meals.  You will need to include extra water to account for your meals.  Some products are great once reconstituted. Others – not so much.  Some people dislike the dry, styrofoam-like texture that many freeze dried food take on.

A Few Extras

In addition to the commercial options there are a number of things you can add to your kit that will make life more enjoyable, should the worst ever happen.  For example, you can add items such fruit cups, granola bars, instant oatmeal, a bag of hard candy, and a pack of gum.  These will need to be rotated out more often, but that little extra goes a long way when stuck in a shelter or working hard on cleanup of a home after a disaster. 

 Don’t forget about your pets. We store three days’ supply of food and water in a kit for our family dog.  She has her own pack and is responsible to carry all her own supplies.

What food you put in your 72 hour kit is personal.  For our family, we tried a variety of MREs, made a list of the ones we liked, the ones we did not like, and the ones we would rather starve than eat.  We try to purchase only the ones we like.  We found we did not like any of the breakfast items in any MREs, so we use freeze-dried breakfast items like the scrambled eggs that we found acceptable.  We added to our kits some fruit cups, granola bars, instant oatmeal, and a small supply of candy.  I might have snuck in a bag or two of beef jerky. 

We go through our packs every 6 months and rotate out the food that needs it.  Typically the freeze dried and MREs rotate out every 3 – 4 years and the rest every six months.  You should also figure out what food options work best for your family.

72 Hour Kit – Shelter

Photo by Josh Hild from Pexels

In a disaster, your living situation may be disrupted.
For your shelter needs, you’ll need to think about clothing and housing.

Clothing

Having clean, comfortable, weather-appropriate clothing is a must in an emergency. Make sure that the clothes that you store in your kit fit, are appropriate for work and school, and meet the needs of your climate. And be sure to review regularly the clothing that you’ve stored, or you might end up in a situation like what our family faced.

About nine years ago, we had a house fire. We grabbed our 72 hour kits, and watched the fire fighters fight to save our home. We were put up in a hotel for the next few weeks as the damage was repaired.

The next few days, we realized that the clothing that we stored in our kit was not appropriate for our situation. Even though we were temporarily homeless, we still had to go to work and school. I showed up at work in the only clean shirt that I had, a Red Cross Disaster response volunteer shirt. I always expected I would assist during a disaster, not need to go back to work. My kids had the same issue. My daughter declared that she wouldn’t be caught dead at school in the clothes stored in her 72 hour kit. And my son had grown a few inches, so his 72 hour kit pants were closer to his knees than his ankles.

We learned from this experience, and now we review our clothing choices every six months.

Housing

When it comes to shelter, a good motto is to prepare for the worst and hope for the best.  Ideally, the best option would be to shelter in our own home.  But the response for some emergencies is to shelter at a different place.

As a Red Cross volunteer who’s set up shelters for numerous hurricanes on the East Coast and fires in the West, I’ve noticed the following about shelters:

In a disaster, someone from the Red Cross evaluates the need for shelter in an affected area. If the area is small, such as a house or apartment fire, the Red Cross puts the families up in a hotel. For larger disasters, the Red Cross sets up a shelter, usually in a high school gymnasium. Some people choose to stay with friends or family. Some people choose to camp in their car or outdoors. You should be prepared for all of these events.

Take advantage of available resources to make this time as comfortable as possible. A tent and sleeping bag is never a waste. You should pack gear to handle bad weather, such as hand and body warmers, lightweight blankets and fire-starters. And finally, make sure that your shelter aids are close by in case of evacuation. We store our sleeping bag and tent in a separate box next to our 72 hour kits in the garage. That way, in an evacuation, we can quickly throw the box into our car and go.

72 hour kit – Water

You need access to clean water in an emergency

Photo by Steve Johnson from Pexels

Water is one of the most important items that you need in your 72 hour kit. Experts say that you need 1 gallon of water per person a day for minimal survival; half a gallon to drink and half a gallon for cleaning and cooking.

Water On the Go

The problem with toting three gallons of water is that it’s heavvvyyy. Three gallons of water weighs about 25 pounds. You’ll probably not be able to carry that much water. You’ll need the ability to clean water. Here are a few options:

Water Purification Tablets

Water purification tablets, found in camping supply stores and online, are tablets that treat water chemically. They are usually comprised of iodine, chlorine, or chlorine dioxide. Water purification tablets are lightweight and relatively cheap. Tablets made with iodine or chlorine will kill giardia and other pathogens in the water, but not cryptosporidium. However, tablets made with chlorine dioxide will kill cryptosporidium, as well as giardia and other pathogens.

The downside of water purification tablets is that they don’t remove particles from the water. Also, water treated with water purification may have a slight chemical taste.

Takeaway: Water purification tablets should be in your 72 hour kit, but you shouldn’t depend upon them solely for your water purification needs.

Filtration Devices

Filtration devices physically remove particles from your water, in addition to removing bacteria and protozoa. Lightweight filters that are appropriate for a 72-hour kit can be found in camping supply stores and online. Filters vary  in price from $30 to over $300. Water filters are measured in microns, where the smaller number the better. We recommend that you get a filter that is .2 microns or smaller to ensure that you are removing giardia.

More expensive filters may also purify water, which remove viruses in addition to bacteria and protozoa. However, you shouldn’t need that level of protection in North America.

Takeaway: Water filters are more expensive than other water purification methods, but they will last a long time in your kit without needing to be replaced.

Bottled water

No matter what methods you use to clean water, you need to store at least some quantity of water. You can carry your water in water bottles or other food-grade water storage containers. Be sure to sterilize the containers before pouring the water in and rotate the water every six months. Your emergency water should be stored away from sunlight and extreme temperatures. You can also purchase water in pouches that are made to store for five years or more.

In addition to having some water in your 72 hour kit, you should have additional water stored in both your home and car. You can store water in clean 2-liter bottles. Just make sure to rotate the water every six months and keep the containers out of sunlight.

Takeaway: It may be difficult to keep a full 72 hours worth of water in your personal 72 hour kit. However you can store extra water in both your car and home.

72 hour kits – The container

There is no hard fast rule as to what you should use to carry your 72 hour kit.  Almost any container will work.  Some are better than others.  Here are a few things you will want to take into consideration for your 72 hour kit.

Which container to choose?

Most 72 hour kits are stored in either a backpack, a bag, or a bucket. Here are the advantages and disadvantages of each:

Bag

You can use a bag, such as a duffel bag or a carry-on style of luggage often seen on airplanes. The advantages are that you can repurpose bags that you already have in your home, emptying them only when you need them for a trip. The disadvantage of this style is portability. Lugging a duffle bag can become tiresome. And while carry-on luggage may have wheels, you never know when you might run into an uneven surface where the wheels may not work.

Bucket

Many people use 5 gallon buckets, such as what food storage may be stored in.  The advantages of the bucket is that it can hold most everything you need, seal nicely against the weather, and work well as a seat when you get tired of carrying them.  The main disadvantage of buckets is they are a pain in the neck to carry.  They might work nicely for girls camp or car camping, but they are not at all practical for an evacuation.

Backpack

Our favorite container is a backpack. That’s because they are generally the most versatile and convenient way to transport a 72 hour kit.  They can hold a lot, are easier to carry over a long distance, and often have lots of pockets to keep things organized. The disadvantage of backpacks is that they are not waterproof. You’ll need to pack your items in waterproof bags in a backpack.

Size

Size of the bag is the next consideration.  First off, it must be large enough to hold everything you need to carry but small enough that you can grab it and carry it with you on the run.  This is extra important to consider when you have small children.  A child dragging a large bucket with their kit inside is not going to last very long. You will be forced to leave the backup behind or get someone else to carry extra.  In most cases, every family member will have their hands full, so it is wise to pack a small backpack for small children and pack only enough in it that they can carry.  This means you may be placing some of their items in another person’s kit.  

Weight

The lighter the bag for a 72 hour kit the better. Depending on the emergency, you might be walking some distance. For example, when backpacking, a loaded backpack should not weigh more than 20% of the person’s body weight.  

Expense

You don’t need to spend a lot of money on an expensive high-end backpack.  We recycled old school backpacks for a number of years.  The important thing is that it holds the items that you need in your kit.   A small inexpensive bag will hold just as much as the high end expensive one.   Start small and work your way up over time.  Unless you see a need, save the money for something else.

Security

If you’re in a natural disaster, you and your family may be forced to evacuate and you end up in a shelter.  Everything you own now fits inside your 72 hour kit.  You are now sharing a shelter with 500 strangers, as you are all living in the same school gym.  You may wish for some sort of lock on your bag, as the only secure storage is sliding it under your cot and covering it with a blanket. I have spent a lot of nights in shelters across the country.  Problems are rare but they can happen.  If your bag has a lock, it wards off temptation.

Packing

When you pack your kit, think of those things that you will need most often and pack them on top.  This is a lot like camping or living out of a suitcase at a hotel.  You do not want to have to unpack each day just to find your medication or other commonly used item.  Pack the heavy stuff and the items you will not need until later first.

Test

Once you have your kit, you should test it.  This does not have to be a big event.  Take a long weekend and try to live out of your kit for 72 hours.  Make a list of what is missing.  Each person, each family will have a kit that is specific to them.  I can’t tell you what you might want in your kit.  No one can.  I can give you a basic outline but what you need is really based on you.  After our first test run, all my children decided that a few card games were an absolute necessity.

Refresh

Last of all, put on your calendar now a plan to check and refresh your kit on a regular schedule.  Being members of The Church of Jesus Christ of Latter Day Saints, we have discovered a plan that works for us.  Every six months the church has a conference broadcast on TV.  In between the Saturday televised sessions, we grab our kits, unpack them, check for expired items, swap out the batteries, make sure the clothing still fits, and give the kit a general freshen up.  This takes less than an hour. The kids get to eat all the candy and food that is swapped out. Should something happen, we will not be stuck in shirts three sizes too small.


The bag is a simple thing.  You can spend a lot of money or you can keep it within budget.  The important thing is to place the items in the kit and have the kits in a designated location where you can get to them quickly in an emergency.  We store ours on shelves in the garage, assuming our first choice will be to make our escape in the car.  Just make sure everyone knows where they are and that they can all be gathered on the run.  Practice with them a few times, then pray you never have to use them for real.

How to prepare for an epidemic

With all the news and worry about the Coronavirus lately I keep being asked “How can I prepare” or “What should I do?”  I’d like to take a moment and address some of these questions.

It’s important that we understand some of the facts about SARS-CoV-2 and the disease it causes, Coronavirus (abbreviated “COVID-19”).  Coronaviruses are actually part of a large family of viruses that are common to animals and people. 

The symptoms of Coronavirus range from that of a mild cold to a severe flu.  As of the date of this article Coronavirus has killed slightly over 3300 people worldwide and 11 people in the United States.  Most experts are quick to point out that if you are truly worried, you should be paying more attention to the common flu. According to the CDC, so far this year the flu in the United States has infected 32 million people and killed over 18,000.  So, is there something to worry about, yes. But is it also likely that this one is just getting a little more press than it deserves.

To begin . . .

Rule number 1 – Don’t panic.  Even as this virus breaks the quarantines and makes its way to the streets of every town, USA, the world is not going to end.  The vast majority of people who get infected live. The flu is currently worse and far more dangerous to you as an American citizen.  Assuming calmer heads prevail, everything will return to normal as this virus runs its course.

CDC recommendations

The CDC, DHS and other organizations have made a number of very excellent recommendations to do TODAY, in advance of an outbreak.  Let’s review a few of them.  

Wash your hands

According to the American Red Cross this is the number one thing you can do to prevent disease transmission.

Get a Flu Shot

Yes, I know that this treats the flu not Coronavirus, however there is some evidence that it may help, keeping you more healthy to fight anything else that comes along.

Store a two week supply of food and water

If you don’t already have a start on a year supply, just ask yourself one question.  If all the stores closed right now, could you survive two weeks? What are you missing? Don’t go out and break the bank or go into debt for this.  An extra case or Top Ramen or a 20 lb bag of rice can go a long way for just a few dollars.

Keep a supply of your prescription and non-prescription drugs on hand

Include pain relievers, stomach remedies, cough and cold medicines and fluids.

Review your medical options

Make sure you know where your medical insurance cards are located and talk with your family about what you might do should something go wrong.

The worst case scenario

But what if calmer heads don’t prevail.  What if the stock market continues the current decline.  What if there is a run on grocery stores and supplies get hard to find.  What if things do go bad?

Don’t Panic –  You are prepared for this, now exercise your plan

Wash your hands –  Then wash them again.  And once more for good measure.  A good hand sanitizer after washing is a good idea. 

Stay Home if Sick – Don’t spread what you have around.  If your co-worker comes to work sick. Give them a very hard time about it.  If you are the boss, tell your employee to not get everyone else sick. Avoid contact with people who are sick.

Cover your mouth and nose – Don’t sneeze on everything and everywhere.  Keep the germs to yourself.

Call your Doctor – If you live in a community where COVID-19 has been detected and you develop symptoms, call your doctor.  Let them help you decide the best course of action.

Limit Travel – Travel only if you have to.  On your return follow recommended guidelines and consider a self quarantine if you have any question at all about your exposure.

Practice Good Health Habits – Get good sleep, eat well.  Drink plenty of liquids and get a little physical activity.

One last thought.  Check your news sources.  Twitter and Facebook are among the worst places to get information about the current situation.  I suggest that you check the facts presented in this article against the latest information from the experts at the Center for Disease Control, The World Health Organization, The American Red Cross.  Oh, and wash your hands!

Links Provided below:

https://www.ready.gov/pandemic

https://www.cdc.gov/coronavirus/2019-ncov/index.html

https://www.redcross.org/get-help/how-to-prepare-for-emergencies/types-of-emergencies/flu-safety.html

72 hour kit – Important papers

72 hour kit important papers

Many of us want to get started down the road to preparedness but don’t know where to start.  The basic 72 Hour kit is probably your best first step. A few things you should know. First, you probably should not go out, and spend money on an expensive kit at a store.  First, it costs money and second, it probably does not contain the things that you really need to take care of your family in a real emergency.


Where to start?

We should start with the purpose of the 72 hour kit.  In a disaster there are three scenarios we think about.  Shelter in place (you stay home and live off food storage).  Extended evacuation (You slowly pack the car with all your camping gear and go car camping for a while).  And the third option the Fast Evacuation (You grab you 72 hour kit and run).

We are talking about option 3.  You have a matter of minutes (or seconds) to grab your kits, get in the car and drive to safety or even flee on foot.  You may end up in a hotel room or in the 40 square feet of high school gym space assigned to you in a Red Cross evacuation shelter.

The first items we are going to collect for this important kit are actually the items that make for the quickest recovery and they are some the the items most often left out.  I am talking about the paperwork.

When our family had a house fire a number of years ago one of the first things we needed was the phone number and information about our home owners insurance.  As we watched from across the street we wondered if all of our most important papers were going to be OK. Would they survive the fire? Would they survive the 500 gallons per minute of water that the fire trucks pump in from each hose?

Electronic vs. paper

Old school we would recommend that you go down to the copy shop and make a photocopy of all of your most important documents.   With technology today you may want to consider electronic copies of everything. Just remember that in a large scale disaster, you may have limited access to the Internet, cell phone data may or may not work, and the ability to charge your phone may become very limited.  I have been in more than one Red Cross shelter where in order to avoid blowing circuits, charging cell phones was not allowed.

Another important document would be some form of ID.  I recommend a copy of your passport, drivers license, or other photo ID.  It may not work as a form of identification but it sure will help when you are working with the authorities to try to get back into your home or to try to get replacement identification.

Contact info

And like it or not another one that you should probably have in the kit is contact information for your life insurance company and agent.  Note that you do not need copies of the entire policy. Contact information for the agents and the company names are usually enough.

While I and doing the paperwork we always add an Emergency Contact List.  This of course will list our all important out of state emergency family contact with email and phone number but also list the family doctor, dentist and other medical professionals.  We also list family friends and work numbers we will need to contact in an emergency.

One more addition we feel will be very helpful is a photo of all your medications or prescriptions.  In a crunch you may need to provide that information to a professional so they can assist you in obtaining refills.

Meeting your needs

This is not a comprehensive list of all the documents that need to be in your kit.  Think about your family and the individual situation. What are the important papers or documents that if lost would really make your life difficult.  Those are the ones that you need copies of in your kit. I used to keep all of mine in a plastic bag in the top of my backpack. Today they are in an encrypted file on my phone with a backup on an old thumb drive.  My recommendation, do what you are most comfortable with, just make sure you can get to those important files when you need them.


Lessons after Hurricane Katrina

In the aftermath of Katrina

As I drove through the streets of Waveland after Hurricane Katrina, I noticed a stark difference between different neighborhoods and sometimes even house to house.  The circumstances were often the same. Two families. Both of them living in what was left of a partially destroyed home. No electricity, no running water, no food, often no utilities of any type.   The roof was ripped off half of the house and a rain storm expected tomorrow.

What was different was that at one house there would be hopelessness.  A lack of direction and no plan for what might come next. We would arrive at their door and they would gladly accept any help we could give but would often have no idea even what to ask for.  We would have to remind them that they needed such basics as water, food, or medicine. It was not that these people did not know. They were in shock and were not thinking clearly and we disaster responders spent a lot of time helping them sort out and formulate a plan for survival.

While the family next door would be full of hope and anticipation.  We would arrive and they would often answer the door and say, “We are just fine.  Go find people who really need help. We will survive.”

We would point out that they were almost out of food, water, or some other essential and they would often say “But we still have some and we will send for help when we need more.”  We would explain that we were the help and restock their supplies, often forcing on them more than they wanted to accept. They were more worried about their neighbors. Many of these homes had already moved the neighbors in and were sharing the meager supplies they had.

There was a night and day difference between the two homes.  Sometimes neighbors. And a distinct pattern quickly became very clear.  Those families or neighborhoods who had invested a little bit of time into preparation for a disaster were consistently in far better shape both physically and mentally than those who made no plans.  

What made the difference?

As I visited many other disasters over the years, I started looking into this in more detail to see if there was one key factor that seemed to make the difference to those that were all but falling apart and those that were acting like this was an unplanned family campout.  What I discovered was simple. In nearly every case the difference was a few minutes of planning. That forethought to put together a few items in a safe place, set a family meeting spot, and discuss openly the what if scenarios with the family. 

It did not seem to matter what kind of 72 hour kit they had.  Some called it a bug-out bag. To others it was the bucket of stuff that they hoped never to us.  To most it represented a few hours of discussion and a small investment into a few items they decided they could not live without.

Why 72 hours? 

In the event of almost any real emergency or large scale disaster, 72 hours is roughly the amount of time that you can expect it to take before you see any help from anyone outside your immediate neighbors.  In a typical disaster, the phone system will be overwhelmed and go offline in minutes. What few services do work will be rerouted and devoted to emergency response.

If a large earthquake hits Salt Lake and Utah Counties, there are a few things you should expect.  Local 911 services will be offline or busy for days. Response time from fire and police will likely be non-existent in residential neighborhoods for at least 3 to 5 days.

The local Red Cross office will immediately activate, but the majority of their local volunteers may be busy taking care of their own families.  The National Red Cross and many other organizations will respond, but it will take about 72 hours before any real presence will be noticed.  The more rural you are, the longer it may be before you see anyone.

Local hospitals and medical services will recall all their staff, but an estimated 30% may be unable to respond.  The same goes for police and fire although the numbers were much worse after Hurricanes Katrina and Sandy.

What can you do?

The bottom line is, in a large disaster you must assume that you are on your own for the first 72 hours.  Longer if you are not in a large city. Roads in Utah are likely to be impassable. Estimates are that it could take as long as a day for each 15 minutes of drive time for your commute to get home.  That means that a drive to the Salt Lake airport from Orem in the initial days after a major earthquake could take three days.

Put some thought into this.  Talk with your family. Formulate a plan.  What would you do if the earthquake happens during the day while everyone is at work or school?  What about evenings or weekends? Do you need to keep your 72 hour kit in your car instead of at home?

I have seen a lot of disasters.  I have seen a lot of people survive and live to tell the tale.  With just a few moments of thought and preparation and a few items stored in a bag in the garage, the stress level of a disaster can be moved from barely scraping by to that of an extended family camp out.

72 hours is roughly the amount of time that you can expect it to take before you see any help from anyone